대학생때 Toy Project로 진행하였던, 손가락 위치에 따른 Trex게임 제어를 포스팅 하겠습니다.
해당 프로젝트는 Mediapipe 라이브러리를 사용하여 손을 인식 시키고, 손가락 위치에 따른 키보드 제어를 통해 Google Trex게임을 다루어보았습니다.
https://google.github.io/mediapipe/solutions/hands.html
Hands
Cross-platform, customizable ML solutions for live and streaming media.
google.github.io

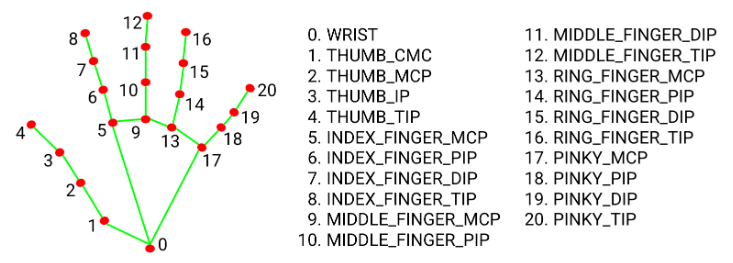
Mediapipe의 hands는 손의 각 부분에 LandMark가 지정되어 있으며, LandMark의 위치에 따른 제어를 진행 할 수 있습니다.
Mediapipe 설치
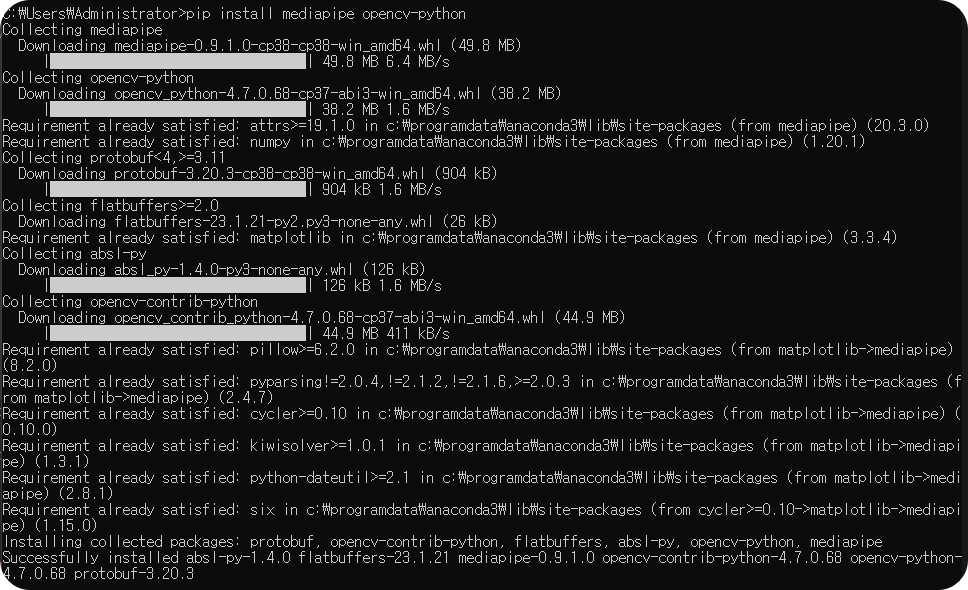
cmd창에서 아래 코드 입력하시면, 설치를 진행하게 됩니다.
pip install mediapipe opencv-python
HandTrackingModule.py 모듈 생성
카메라에 화면을 띄우고 손을 인식 시키기위한 모듈 입니다.
import cv2
import mediapipe as mp
import time


class handDetector():
    def __init__(self, mode=False, maxHands = 2, detectionCon= 0.5, trackCon=0.5):
        self.mode = mode
        self.maxHands = maxHands
        self.detectionCon = detectionCon
        self.trackCon = trackCon

        self.mpHands = mp.solutions.hands
        self.hands = self.mpHands.Hands(self.mode, self.maxHands, self.detectionCon, self.trackCon)
        self.mpDraw = mp.solutions.drawing_utils

    def findHands(self, img, draw=True):
        imgRGB = cv2.cvtColor(img, cv2.COLOR_BGR2RGB)
        self.results = self.hands.process(imgRGB)
        # print(results.multi_hand_landmarks)

        if self.results.multi_hand_landmarks:
            for handLms in self.results.multi_hand_landmarks:
                if draw:
                    self.mpDraw.draw_landmarks(img, handLms, self.mpHands.HAND_CONNECTIONS)

        return img

    def findPosition(self, img, handNo=0, draw=True):

        lmList = []
        if self.results.multi_hand_landmarks:
            myHand = self.results.multi_hand_landmarks[handNo]

            for id, lm in enumerate(myHand.landmark):
                # print(id, lm)
                h, w, c = img.shape
                cx, cy = int(lm.x * w), int(lm.y * h)
                # print(id, cx, cy)
                lmList.append([id, cx, cy])
                if draw:
                    cv2.circle(img, (cx, cy), 3, (0, 0, 255), cv2.FILLED)

        return lmList

def main():
    pTime = 0
    cTime = 0
    cap = cv2.VideoCapture(1)
    detector = handDetector()

    while True:
        success, img = cap.read()
        img = detector.findHands(img)
        lmList = detector.findPosition(img)
        if len(lmList) != 0:
            print(lmList[4])

        cTime = time.time()
        fps = 1 / (cTime - pTime)
        pTime = cTime

        cv2.putText(img, str(int(fps)), (10, 70), cv2.FONT_HERSHEY_PLAIN, 3,
                    (255, 0, 255), 3)

        cv2.imshow("Image", img)
        cv2.waitKey(1)


if __name__ == "__main__":
    main()
Trex_jump.py
HandTracking 모듈을 연결 시켜주고, .pyautogui를 통하여 LandMark의 위치에 따라 키보드를 제어할 수 있습니다.
import cv2
import time
import HandTrackingModule as htm
import pyautogui

def jump():
    pyautogui.keyDown('space')
    time.sleep(0)
    print("jump")
    pyautogui.keyUp('space')

cap = cv2.VideoCapture(0)


detector = htm.handDetector(detectionCon=0.75)

while True:

    success, img = cap.read()
    img = detector.findHands(img)
    lmList = detector.findPosition(img, draw=False)
    # print(lmList)

    if len(lmList) != 0:
        if lmList[8][2] < lmList[6][2]: # y 방향일때 2 , x 방향일때 1
            jump()
            cv2.putText(img, "jump", (100, 70), cv2.FONT_HERSHEY_PLAIN, 2, (255, 255, 255), 3)

        if lmList[20][2] < lmList[18][2]:
            pyautogui.keyDown('down')
            time.sleep(0)
            print("down")
            cv2.putText(img, "Down", (480, 70), cv2.FONT_HERSHEY_PLAIN, 2, (255, 255, 255), 3)
        else:
            pyautogui.keyUp('down')


    cv2.imshow("Dino Hand Tracking", img)
    cv2.waitKey(1)
if lmList[8][2] < lmList[6][2]:
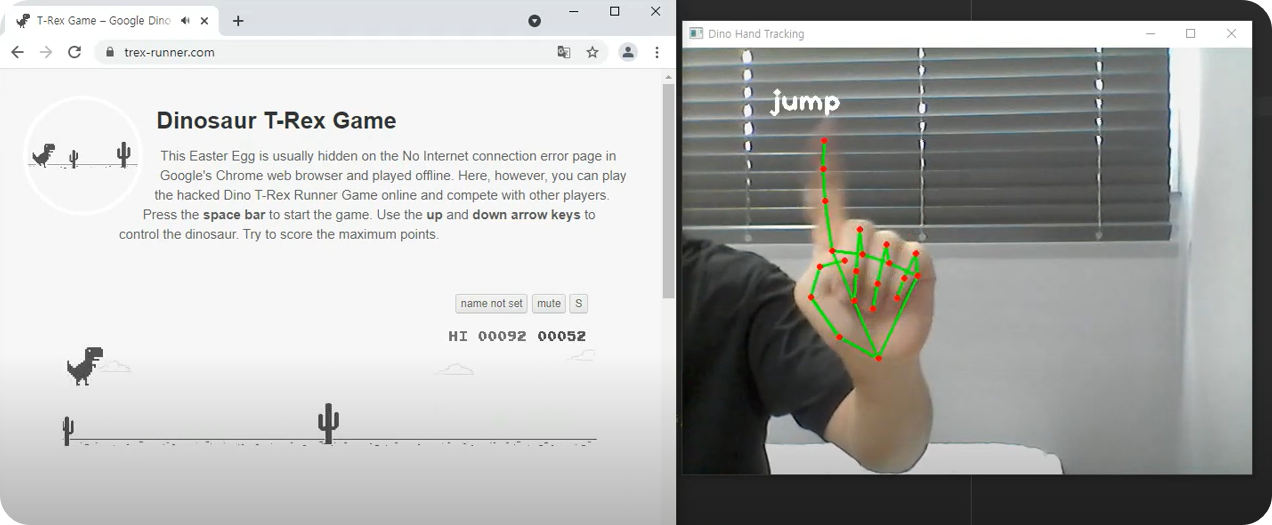
LandMark의 8번이 6번 아래로 내려가게 되면, junp()라는 함수를 호출하고 "jump"라는 문구를 표시하게 됩니다.
if lmList[20][2] < lmList[18][2]:
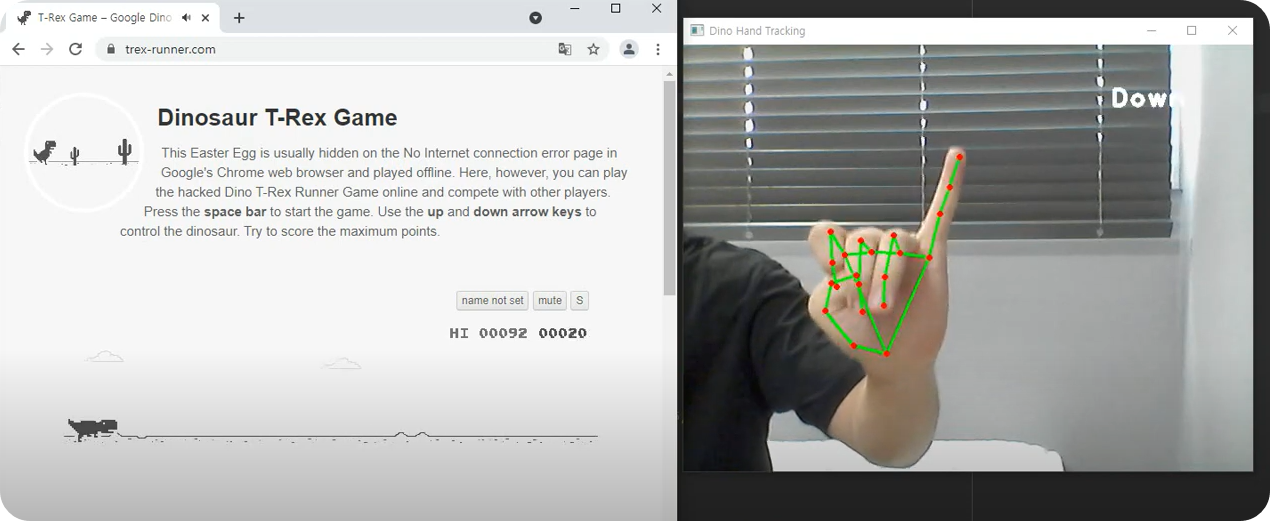
LandMark의 8번이 6번 아래로 내려가게 되면, keyDown('down')이 호출되어 키보드 아래방향 키를 누른 상태를 보여주고 "jump"라는 문구를 표시하게 됩니다.
cv2.capture(0) 부분은 현재 기본으로 설정되어있는 카메라(노트북 내장 카메라)를 통해 화면을 띄워줍니다. 다른 카메라를 연결하여 사용하는 경우 해당 부분을 1로 바꾸로 사용하시면 다른 카메라를 사용하실 수 있습니다.
결과


'- Python > OpenCV' 카테고리의 다른 글
| [Opencv] Mediapipe를 사용하여 가상볼륨 조절기 만들기 (0) | 2023.02.12 |
|---|